Monday, November 8, 2010


Evaluation


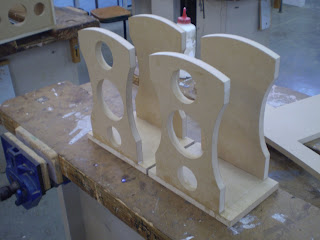
This year we built stereo speakers out of wood materials. Terry was our teacher for this year. After we were given an introduction to the subject we started drawing conceptual shapes for our speakers. Once I had chosen the shape for my speakers I drew up the template for my face plate. I used the jigsaw to cut it out.

Before I could go any further I had to create a 3-Dimensional mockup of what my speakers would look like. This was a long process and I would have liked to skip this stage and go straight onto building my speakers.  The next stage involved using my template to draw up the perimeter of the front and back plates for my speakers on MDF. It took a couple of days to cut these out once they were finished.

Now that the faces of my speakers were cut out it was time to begin the labourious process of sanding them down to acquire the shape I wanted. This took about 3 weeks. Once the bottom plates were cut out it was time to build the skeleton of my speakers. I used glue to stick the plates together and I made sure they stayed in place by drilling screws to the joints. Next came the braces to help the speakers stay together. I bogged up the gaps left by the drilling and proceeded to the next step.

I layered the insides of my speakers with carpet and then I began to apply a layer of bendy plywood to the sides of my speakers. The first external layer was complete. Not long afterwards Terry told me I needed to apply a second layer of bendy plywood. Throughout doing this I had to undergo a process of applying glue to the surface of the first layer and then clamping down the second layer over top and waiting for it to stick and dry. Once this was done I had to cut off the excess wood hanging over the                                                          sides and sand it down to perfectness... again.

Once the week long bogging process was over I was up to the final stages of finishing my speaker cabinets. Priming. Prime number 1 required a couple of sessions worth of sanding and bogging afterwards and left me with very little time to finish. Prime number 2 was the final step in the creation of my speaker cabinets. Done. I just need to take one more photo.

Friday, October 15, 2010

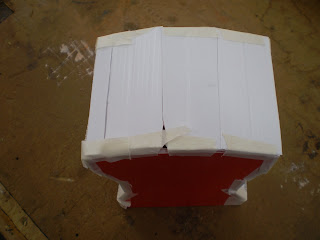
Applying Bog to My Speakers (photo 2)

*See the description of photo 1*

Applying Bog to My Speakers (photo 1)


This photo was taken after I had trimmed down the excess wood hanging over the edges and applied bog to the gaps.
Saturday, October 9, 2010

Standing Wave/Phase Cancellation Notes

Standing Waves
Standing waves are waves produced when two sound waves of the same frequency and amplitude travel in opposite directions in the same medium.

Phase Cancellation
Phase cancellation occurs when two microphones or any other sound recording device picks up the same sound at different times. If you think of a sound wave as a series of hills and valleys, a microphone that is nearest to a speaker might intercept the sound at the top of the waveform while a microphone that is furthest from a speaker might pick up the sound at the bottom of the cycle.

Monday, September 13, 2010

My Speakers After Sanding Down the Rough Edges

This photo was taken after I cut off the excess wood that was hanging over the edges.

Monday, August 30, 2010

My First Speaker After Applying Both the Layers of Bendy Plywood

This photo was taken after I applied the second layer of bendy plywood to my first speaker. I still need to cut off the plywood hanging over the edges.

Monday, August 9, 2010

Applying the Second Layer of Bendy Plywood to My Second Speaker

This photo was taken as I was applying the second layer of bendy plywood to my second speaker.

Applying the Second Layer of Bendy Plywood to My First Speaker (photo 1)

This photo was taken as I was applying the second layer of bendy plywood to my first speaker.

Monday, July 19, 2010

My Speakers After Applying the First Layer of Bendy Plywood


This photo was taken after I applied the first layer of bendy plywood to both of my speakers. This took about two weeks.

Monday, June 14, 2010

Carpet After Being Applied to the Speakers

This picture was taken before I cut off the excess pieces of carpet that were hanging off the speakers.

Monday, May 31, 2010

Belt Sander


I used this machine to even out the uneven surfaces of my front and back plates for both my speakers.

Tools I Used


This is a photo of the tools I have been using so far to build my speakers.

I used the clamp to hold my front and back plates together to perform various tasks such as using the jigsaw to cut off excess wood and using the belt sander to even out uneven surfaces.
I used the drill to screw in drills so my plates would stay together.
I used various measuring tools such as the ruler to make sure I had the right measurements on my speakers.

Monday, May 24, 2010

Both My Speakers After I Applied Bog to the Gaps (photo 2)

(See description of photo #1).

Both My Speakers After I Applied Bog to the Gaps (photo 1)


This photo was taken shortly after the last one. I applied bog to the spaces where I drilled in the screws. This will most likely require a small amount of sanding to even out the surface.

Both My Speakers After the Braces Were Applied


This photo was taken after I had applied braces into my speakers to stabilize them. I drilled 1 screw at both ends of the braces to make them stay in place.

Monday, May 17, 2010

Both My Speakers After Bogging (photo 2)


This is after I bogged the space above the screws and then wiped back the excess bog.

Both My Speakers After Bogging (photo 1)


This is after I bogged the space above the screws and then wiped back the excess bog (I would be doing this a LOT in the future months).

Both Sets of Speaker Plates After Drilling in the Screws (photo 2)

*See description of photo 1*

Both Sets of Speaker Plates After Drilling in the Screws (photo 1)


Both sets of my speaker plates after I glued the front and back plates to the bottom plates using wood glue, and then drilled the screws in.

First Set of Speaker Plates After Being Fixed Together


My first set of front and back plates after I glued them with wood glue and fixed them together.

Me in the Workshop (photo 2)

Me working on my speaker back plate.

Monday, April 26, 2010

Speaker Front & Back Plates After Being Sanded Out

My speaker front and back plates after being sanded out.

Monday, March 29, 2010

Speaker Faceplate (after being cut, photo 2)

My speaker front/back plates after I have cut them out with a jigsaw (taken from a different angle).

Speaker Faceplate (after being cut)


My speaker front/back plates after I have cut them out with the jigsaw.

Speaker Faceplate (before being cut)

My speaker faceplate before I have cut it out.

Wednesday, March 10, 2010

Speaker Mockup (photo 7)


Mockup of my speaker.

Speaker Mockup (photo 6)


Mockup of my speaker.

Speaker Mockup (photo 5)


Mockup of my speaker.

Speaker Mockup (photo 4)


Mockup of my speaker.

Speaker Mockup (photo 3)


Mockup of my speaker.

Speaker Mockup (photo 2)

This photo was taken about halfway through the process of creating the mock-up for my speakers.
To be honest I would have preferred if we went straight to building the actual speakers seeing as most people in Practical Workshop had experience with building objects such as longboards due to courses taken from the previous year.

Speaker Mockup (photo 1)

This photo was taken straight after I cut out the face plate for the mock-up of my speaker.

Speaker Template (photo 3)

Wednesday, February 17, 2010

Speaker Design (Freehand)

This is my speaker face plate design drawn up in Freehand, a computer sketching program.

Speaker Template (photo 2)

Speaker Template (photo 1)

This is the template for the stereo speakers I will be creating in Practical Workshop this year. The final product will most likely be the exact same shape as the drawing you see here. I have not yet cut it out.

Conceptual Shape for my Speakers

This is the shape I have decided to use for my stereo speakers that I will be creating in Practical Workshop this year. The final product may differ slightly from this drawing.

Wednesday, February 3, 2010